Concrete is one of the most widely used construction materials in the world, known for its strength and durability. But what happens when concrete structures are demolished or old concrete is no longer needed? Can concrete be recycled? The answer is a resounding yes—and recycling concrete is a sustainable and cost-effective solution that benefits both the environment and the construction industry.

What is recycled concrete?

Recycled concrete is produced by crushing old concrete structures, such as buildings, bridges, and pavements, into smaller pieces. These crushed pieces, called recycled concrete aggregate (RCA), can be reused as a substitute for natural aggregates in new construction projects.

Recycling concrete helps reduce the demand for virgin materials and minimises waste sent to landfills. It also reduces the carbon footprint of construction projects, making it a more eco-friendly choice.

Benefits of recycling concrete

Recycling concrete offers several environmental and economic benefits:

1. Reduces construction waste
Instead of sending demolished concrete to landfills, recycling gives it a second life, significantly reducing the volume of construction waste.

2. Conserves natural resources
By using recycled aggregates, fewer natural resources, such as gravel and sand, need to be extracted. This helps preserve ecosystems and reduces the environmental impact of mining operations.

3. Lowers carbon emissions
Transporting virgin aggregates requires energy and produces greenhouse gases. Using RCA from local sources reduces transportation distances, cutting down on emissions.

4. Saves money
Recycled concrete is often more cost-effective than virgin materials, making it an attractive option for budget-conscious projects.

5. Promotes circular economy
Recycling concrete aligns with the principles of a circular economy, where materials are reused and repurposed, minimising waste.

How is concrete recycled?

Recycling concrete involves several steps:

  1. Demolition – Old concrete is removed from structures, typically during demolition projects.
  2. Sorting –The concrete is separated from other materials, such as rebar, wood, and plastic. Magnetic separators are often used to remove metal reinforcements.
  3. Crushing – The concrete is crushed into smaller pieces using industrial crushers. These fragments can be further processed to meet specific size requirements for different applications.
  4. Screening – The crushed concrete is screened to remove fine particles and ensure uniformity.
  5. Reuse – The recycled concrete is then used as a substitute for natural aggregates in various applications, including road construction, foundations, and landscaping.

Applications of recycled concrete

Recycled concrete is a versatile material that can be used in a variety of construction projects, such as:

  • Road base and subbase: RCA provides a stable foundation for roads and pavements.
  • Backfill material: It can be used to fill trenches and holes during construction.
  • Drainage systems: Crushed concrete allows for efficient water flow in drainage projects.
  • Landscaping: RCA is a cost-effective option for pathways, retaining walls, and decorative features.
  • New concrete: Recycled concrete can be incorporated into new concrete mixes, reducing the need for virgin aggregates.

Challenges of recycling concrete

While recycling concrete has many advantages, it also comes with some challenges:

  • Contamination: Impurities in demolished concrete, such as plastics and chemicals, must be carefully removed.
  • Strength variability: Recycled concrete may have slightly different properties than virgin aggregates, which can affect the performance of the final product.
  • Processing costs: While cost-effective in many cases, recycling facilities require specialised equipment and labor.

However, advancements in technology are addressing these challenges, making concrete recycling more efficient and accessible.

Concrete is one of the most widely used materials in construction, known for its strength, durability, and versatility. However, even the most expertly poured concrete can develop cracks during the drying process, often leaving builders and property owners concerned. Understanding why concrete cracks when drying can help manage expectations and implement strategies to minimise cracking.

The science behind drying concrete

When concrete is poured, it undergoes a chemical process known as hydration, where water reacts with cement to form a hard, durable matrix. This process is not the same as “drying.” In fact, concrete doesn’t simply dry out—it cures. During curing, moisture is retained within the mix to ensure proper hydration and to allow the material to reach its full strength.

Cracking often occurs due to internal and external stresses placed on the concrete as it cures. Below are the primary reasons for cracking:

1. Shrinkage during drying

Concrete contains water that begins to evaporate as it cures. This evaporation causes the concrete to shrink slightly. If the shrinkage is uneven or if parts of the concrete are restrained by the ground or other structural elements, tension builds up. Once the tension exceeds the tensile strength of the concrete, cracks can form.

This phenomenon is especially common in larger concrete slabs, as the volume of water loss and the potential for uneven drying increases with size.

2. Rapid moisture loss

If concrete loses moisture too quickly, it can lead to surface cracking known as plastic shrinkage cracks.

Rapid moisture loss can occur due to:

  • Hot, dry, or windy weather conditions
  • Insufficient curing measures (e.g., lack of protective coverings or curing compounds)
  • Poor water-to-cement ratio in the mix

Proper curing practices, such as keeping the surface damp or using curing membranes, can help slow down evaporation and reduce the risk of cracking.

3. Thermal changes

Temperature fluctuations during curing can cause thermal expansion and contraction. If the concrete expands or contracts too quickly, it may crack. This is particularly an issue for large pours, as the center of the slab may retain heat while the surface cools and contracts.

4. Poor mix design

The composition of the concrete mix plays a significant role in its behaviour. Too much water, improper aggregate selection, or low-quality cement can weaken the mix, making it more prone to cracking. Additionally, adding too much water to make the mix easier to work with can increase shrinkage during curing.

5. Improper placement and finishing techniques

Mistakes during the pouring and finishing process can contribute to cracking. Overworking the surface, not compacting the mix properly, or pouring on improperly prepared ground can lead to stresses and vulnerabilities in the final structure.

Can cracks be prevented?

While it’s nearly impossible to prevent all cracks, there are several steps that can minimise their occurrence:

  1. Proper curing: Ensure the concrete cures slowly by covering it with damp blankets, plastic sheeting, or applying curing compounds.
  2. Control joints: Install control joints to direct cracking along predetermined lines, reducing random cracks.
  3. Ideal weather conditions: Pour concrete in moderate weather and avoid extreme heat or cold.
  4. Good mix design: Use a high-quality mix with the appropriate water-to-cement ratio.
  5. Professional installation: Hire experienced professionals who understand the importance of proper placement and finishing techniques.

What to do about cracks in concrete

Not all cracks are a sign of structural failure. Hairline or surface cracks are often cosmetic and can be repaired with patching materials or sealants. However, larger cracks or those that extend 

Concrete cracking during drying is a natural result of the material’s behaviour under stress, but it doesn’t have to be a cause for alarm. By understanding the reasons behind cracking and implementing preventive measures, you can ensure a stronger, more durable concrete structure. Whether you’re working on a small patio or a large commercial project, proper planning and care are essential to minimising cracks and achieving a long-lasting finish.

If you’re looking for expert advice or professional concrete services, contact us at. Our experienced team can guide you through every step of your project, ensuring the best possible results.

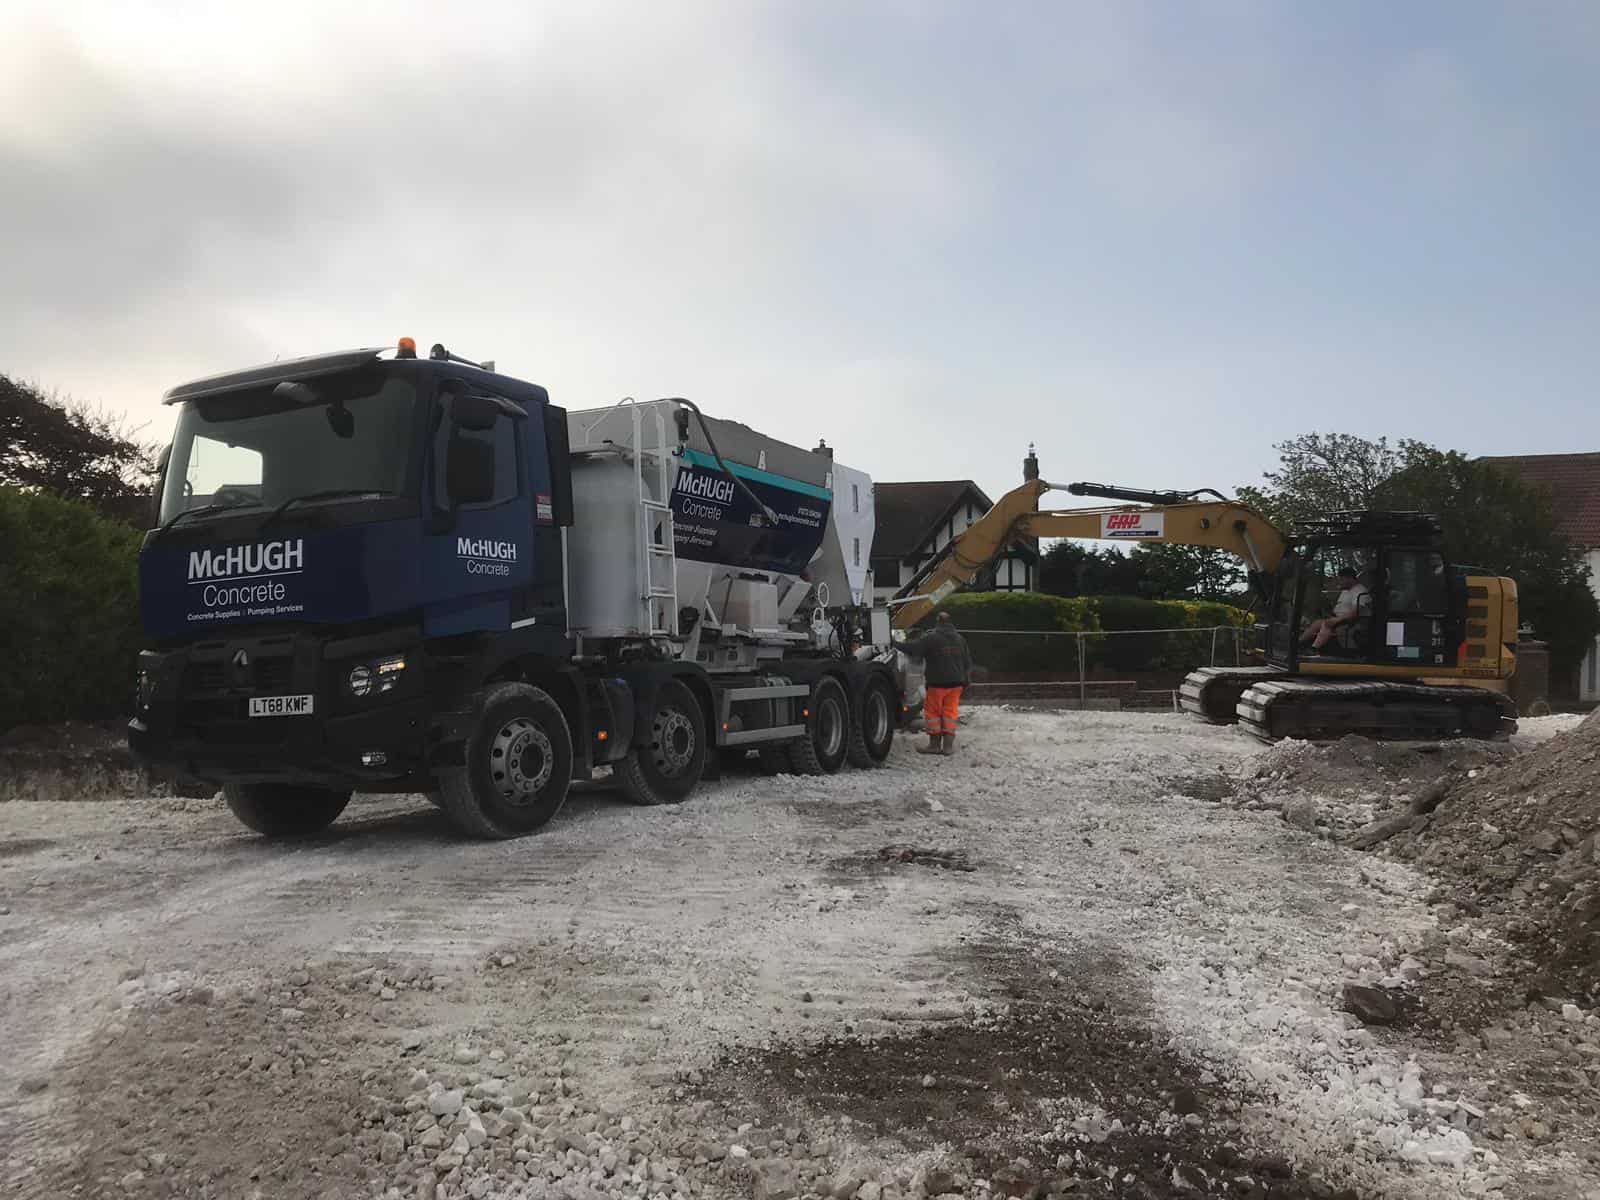
McHugh Concrete Truck on Brighton & Hove Promenade

What is ready mix concrete and what are the advantages of using it?

Ready-mix concrete (RMC) refers to a type of concrete that is manufactured in a batch plant. At McHugh, we supply volumetric concrete that allows on-site mixing of concrete. Unlike traditional ready-mix concrete, where the concrete is pre-mixed and transported to the construction site, volumetric concrete mixers carry the raw materials separately and mix them on-site as needed.

The key features of ready-mix concrete include:

Consistency: Ready-mix concrete is produced in a controlled environment, allowing for precise measurement and mixing of its components. This results in consistent quality and properties from one batch to another.

Convenience: RMC is delivered to the construction site ready for immediate use. This eliminates the need for on-site mixing, reducing labour, time, and equipment requirements.

Quality assurance: Ready-mix concrete manufacturers follow strict quality control measures to ensure that the concrete meets specified standards and requirements. This includes testing raw materials, monitoring the mixing process, and conducting quality checks on the finished product.

Customisation: Ready-mix concrete can be customised to meet specific project requirements, such as strength, durability, workability, and setting time. Engineers can design the mix proportions based on the needs of the project.

Reduced wastage: Since RMC is produced in a batch plant, the exact amount needed for a project can be ordered, reducing material wastage and cost.

Performance: Ready-mix concrete is designed to meet various performance criteria, such as strength, durability, and workability, making it suitable for a wide range of applications, including residential, commercial, industrial, and infrastructure projects.

Overall, ready-mix concrete offers numerous advantages over on-site mixing, making it a preferred choice for many construction projects where quality, consistency, and efficiency are essential.

What is ready mix concrete made of?

Ready-mix concrete is a mixture of several key components, each serving a specific purpose to achieve desired properties and performance. These components typically include:

Cement: Cement acts as a binding agent in concrete, providing cohesion and strength. Portland cement is commonly used in ready-mix concrete production.

Aggregates: Aggregates are the inert granular materials, such as sand, gravel, crushed stone, or recycled concrete, that make up the bulk of concrete. They provide volume, stability, and strength to the concrete mixture.

Water: Water is essential for the hydration of cement, which is the chemical reaction that binds the ingredients together and gives concrete its strength and durability. The amount of water used affects the workability and strength of the concrete.

Admixtures: Admixtures are added to modify the properties of concrete, such as setting time, workability, durability, and strength. Common admixtures include plasticisers (to improve workability), accelerators (to speed up setting time), retarders (to delay setting time), air-entraining agents (to improve freeze-thaw resistance), and water reducers (to reduce water content while maintaining workability).

The proportions of these components vary depending on the desired characteristics of the concrete, such as strength, durability, workability, and setting time. Ready-mix concrete is produced under controlled conditions in specialised batching plants, where these ingredients are combined in precise proportions according to a predetermined mix design. This ensures consistency and quality in the final product.

How do you calculate how much ready mix concrete you need?

To calculate how much ready-mix concrete you need you can use our handy concrete calculator 

To manually work out how much you need, follow the steps below:

Determine the Volume: Measure or calculate the volume of the area where you’ll be pouring the concrete. This could be the volume of a slab, footing, column, or any other structure you’re working on. Measure the length, width, and depth in your preferred metric e.g. metres and multiply these dimensions together to find the volume in cubic metres.

For example, if you’re pouring a concrete slab that measures 3 metres long, 2.5 metres wide and 0.1 metres deep, the volume would be:

Length × Width × Depth (3 m × 2.5 m × 0.1 m) = 0.75 cubic metres.

Consider overages: It’s a good idea to order slightly more concrete than your calculated volume to account for any unexpected spillage, waste, or variations in the actual pouring thickness. In the UK, a common recommendation is to add about 5-10% to your calculated volume to ensure you have enough concrete to complete the project. Our ready mix concrete however is poured on site, so will ensure you always have just the right amount. 

Order the concrete: Contact us and provide us with the calculated volume along with any special requirements for the concrete mix (e.g., strength, slump, admixtures). We will help you determine the quantity of concrete needed and schedule a delivery.

How far can ready mix concrete be pumped?

McHugh Concrete has three static line pumps, a 24m and 42m boom pump, which can overcome even the trickiest of access issues, whether those be a steep incline, steep slope, access to the rear of a property, obstacles in the way, or simply a location that is a long way from the road.

Our static line and boom concrete pumps can get concrete to the most inaccessible of sites with ease and without mess; we can even pump through buildings. Our static line pump can push concrete up to 150 metres directly into your prepared area, ready for you to level.

It makes sense to get a pump when you compare that a 6m3 pour will equate to 160 wheelbarrow loads and will take four people at least 2.5 hours to move.

What things do I need to consider when getting ready mix concrete delivered?

The main things to consider are as follows: 

  • Is there clear access to park on the highway in front of your property?
  • How will you get the concrete to your work area; directly from chute, wheelbarrow or pumped?
  • Are there any over-head or below-ground structures?
  • Do you need our truck to go off the highway? If so, is the ground safe to do so? (Vehicle is 38 Tonnes fully laden.)
Polished concrete flooring example

1. Polished concrete: sleek and modern

When embarking on a self-build project, choosing the right flooring is a critical decision that can impact the comfort, durability, and aesthetics of your home. Concrete, often associated with commercial and industrial spaces, has become an increasingly popular flooring option for residential builds. Its versatility, durability, and modern look make it a compelling choice for self-builders. But with various concrete flooring options available, which one is best for your home? Let’s explore the possibilities.

Best for: Modern homes, open-plan layouts and spaces with high foot traffic.

Benefits:

  • Aesthetic appeal: Polished concrete offers a sleek, sophisticated finish that complements contemporary home designs. Its glossy, reflective surface adds a luxurious touch to kitchens, living rooms, and hallways
  • Durability: Polished concrete is incredibly tough and long-lasting, making it resistant to scratches, chips, and wear. This makes it ideal for high-traffic areas
  • Low maintenance: Once sealed, polished concrete floors are easy to clean with just a mop and water, reducing the time and effort needed to maintain them

Considerations:

  • Polished concrete can feel cold underfoot, though this can be mitigated with underfloor heating
  • It may not be the best choice for those seeking a softer, more traditional look for their home

2. Exposed aggregate concrete: unique and textured

Best for: Outdoor patios, entryways, or unique interior spaces

Benefits:

  • Customisable: Exposed aggregate concrete can be tailored to suit your style by choosing different sizes and types of aggregate (small stones) to create a textured, visually striking surface
  • Slip-resistant: The rough texture of exposed aggregate concrete makes it less slippery, especially when wet, which is useful for outdoor areas or entryways
  • Durability: Like polished concrete, it’s highly resistant to wear and tear, making it a durable option for high-traffic areas

Considerations:

  • The rough texture may not suit all interior spaces, especially if you prefer smooth surfaces
  • It can be more challenging to clean compared to polished or smooth concrete due to the uneven surface

3. Stamped concrete: patterned and decorative

Best for: Homes with a more traditional or rustic design, or outdoor patios.

Benefits:

  • Versatile design: Stamped concrete can mimic the look of more expensive materials like stone, brick, or tile, allowing you to achieve a high-end look at a lower cost
  • Durable: Like other types of concrete, it’s durable and resistant to damage from heavy foot traffic and furniture
  • Customisable: You can choose from a wide variety of patterns and colors to suit your aesthetic preferences

Considerations:

  • Stamped concrete requires regular resealing to maintain its appearance and protect it from wear
  • It’s important to work with skilled contractors to avoid common pitfalls like improper stamping or uneven colouring

4. Micro-cement: minimalist and seamless

Best for: Modern, minimalist interiors, and smaller spaces where seamless flooring is desired.

Benefits:

  • Thin and lightweight: Micro-cement is a thin layer of cement applied over existing floors, making it a great option for renovations without adding significant weight or thickness to the floor
  • Seamless look: It offers a continuous, smooth finish with no visible joints, giving your home a clean, minimalist feel. This can help make smaller spaces feel larger
  • Customisable: Available in a range of colours and finishes, from matte to glossy, micro-cement can be tailored to suit your design vision

    Considerations:

    • Micro-cement can be prone to cracking if not applied correctly, so it’s essential to work with experienced installers
    • While durable, it’s not as tough as full-depth concrete, so it may not be the best option for areas with heavy furniture or equipment

    5. Self-levelling concrete: smooth and practical

    Best for: Base layer under other flooring or as a smooth, minimalist finish.

    Benefits:

    • Perfect for uneven surfaces: Self-levelling concrete is designed to create a perfectly level surface, making it ideal for correcting uneven subfloors before adding other finishes like tiles, carpet, or hardwood
    • Smooth finish: When used as a top layer, self-levelling concrete provides a clean, smooth finish that suits modern, minimalist homes
    • Easy installation: Self-levelling concrete is relatively easy to apply and requires less labour than traditional concrete floors

    Considerations:

    • While it provides a smooth finish, it lacks the visual texture or customisation options of other concrete types
    • It may not be as durable as polished or stamped concrete, so it’s often used as a base for other floorings

    6. Concrete tiles: customisable and modular

    Best for: Homes looking for flexibility in design, particularly bathrooms or kitchens.

    Benefits:

    • Modular design: Concrete tiles come in a variety of shapes, sizes, and colours, offering endless possibilities for customisation
    • Easy repairs: If a tile gets damaged, it can be replaced without redoing the entire floor, unlike a poured concrete floor
    • Water-resistant: Concrete tiles are a great choice for kitchens and bathrooms due to their water-resistant properties

    Considerations:

    • The grout between tiles can become a cleaning challenge if not properly sealed
    • Tiles may not provide the seamless look that many people seek in modern concrete floors

    The best concrete floor for your home depends on your style preferences, functional needs, and the areas where it will be installed. For a modern, sleek look, polished concrete or micro-cement may be the ideal choices. If you prefer texture and visual interest, exposed aggregate or stamped concrete offers a more unique and decorative finish. And for practicality, especially in high-traffic areas or as a subfloor, self-levelling concrete is a solid option.

    Concrete floors can bring a contemporary edge to your home while offering excellent durability and low maintenance. By considering the specific needs of your build, you can select the concrete flooring type that best suits your home’s design and functionality.

      Commercial concrete

      What is Volumetric Concrete and how does it work?

      Volumetric concrete is a mobile batching plant that allows on-site mixing of concrete. Unlike traditional ready-mix concrete, where the concrete is pre-mixed and transported to the construction site, volumetric concrete mixers carry the raw materials separately and mix them on-site as needed.

      The process involves a volumetric mixer, which is essentially a mobile concrete batching plant mounted on a truck or trailer. The mixer has separate compartments for sand, cement, water and aggregates. These components are precisely measured and mixed on-site based on the specific requirements of the project. This on-demand mixing capability provides a level of flexibility and efficiency that traditional concrete delivery methods struggle to match.

      Benefits of Volumetric Concrete

      Efficiency

      As volumetric trucks are able to mix the exact quantities of concrete, your risk of ordering too little or too much concrete for a project is significantly reduced, which offers a huge advantage over other forms of ready mix concrete, both in terms of cost risk and concrete waste disposal.  

      For example, if too much concrete has been ordered the material can remain on the lorry and be used for another job, as the components of the concrete (sand, aggregate, cement and water) have not been mixed together, and you will only be charged for the material used.  

      On the flipside, if more concrete is required than has been ordered, providing there is sufficient spare material on the truck, additional concrete can be mixed to complete your pour, avoid the need to order in additional trucks and possibly having to bring labour back to site another day.

      Flexibility and Customisation

      Volumetric concrete allows for real-time adjustments to the concrete mix, enabling construction professionals to tailor the material to the specific needs of each project. This flexibility is particularly valuable when dealing with varying project specifications and requirements.

      Reduced Waste

      Traditional ready-mix concrete often results in leftover material that goes unused, leading to waste. With volumetric concrete, the mix is created on-site, eliminating the risk of overordering and reducing waste. This aligns with the growing emphasis on sustainability in the construction industry.

      Time Savings

      Volumetric concrete can significantly reduce construction time by eliminating delays caused by waiting for concrete deliveries. Construction teams can have a continuous and controlled supply of fresh concrete, enhancing project timelines.

      Quality Control

      On-site mixing allows for better control over the quality of the concrete. Construction professionals can make adjustments as needed, ensuring that the final product meets the desired strength and durability standards.

      When is it best to use Volumetric Concrete?

      Remote or Challenging Sites

      Volumetric concrete is particularly valuable in remote or challenging construction sites. The ability to be able to batch on site enables the lorries to travel longer distances and remain on site for longer periods of time as the concrete is batched on demand, rather than being transported to site ready mixed, where there is a risk of the concrete curing in the truck overtime.  Working in conjunction with a concrete line pump it is possible to deliver Volumetric concrete to pretty much anywhere it is needed.

      Road Construction

      Road projects, such as repairs and maintenance, benefit from the versatility of volumetric concrete. Construction teams can produce concrete on-site, responding promptly to changing conditions and ensuring a continuous supply.

      Small to Medium-Scale Projects

      Volumetric concrete is ideal for small to medium-scale construction projects where precise quantities of concrete are needed. Its flexibility and cost-effectiveness make it a preferred choice for residential and commercial developments.

      Infrastructure Development

      Major infrastructure projects, including bridges and tunnels, can capitalise on the advantages of volumetric concrete. The ability to adjust the mix on-site ensures that the concrete meets the specific requirements of these critical structures.

      Volumetric concrete is reshaping the construction industry by offering a dynamic and efficient alternative to traditional concrete delivery methods. Its flexibility, reduced waste, and on-demand mixing capabilities make it a valuable choice for a wide range of construction projects.
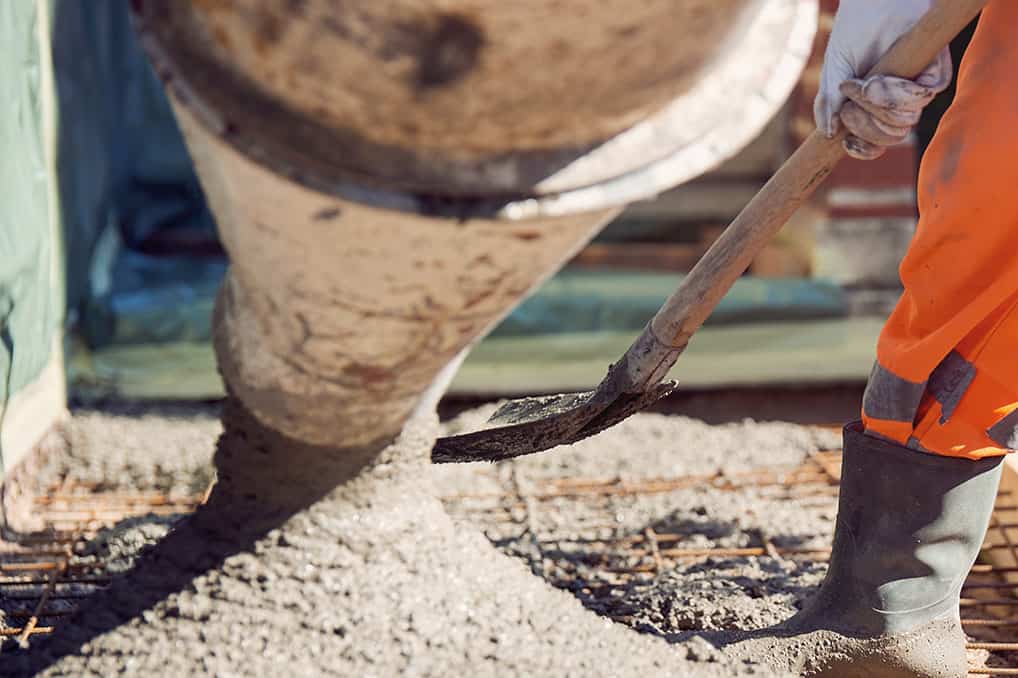
      The concrete mix for farm and agricultural sites needs to be particularly durable, especially for external areas and routes between units. This is due to higher levels of wear and tear from farm equipment scraping surfaces, in addition to variable weather conditions and temperatures throughout the year. 

      The same goes for livestock feeding / housing areas, where the integrity of concrete for hygiene purposes and ease of cleaning is of utmost importance. This is in order to comply with Quality Assurance Schemes and the Food Safety Act. These areas need to withstand high levels of animal traffic, mud and a mixture of wet and dry conditions, with minimal / no degradation in surface quality. 

      Types of concrete needed for agricultural purposes

      Below we have set out the options for concrete choices for agricultural sites. The key here is to consider whether your site has ‘high’, or ‘severe’ exposure to the elements. RC35 is a great option for high exposure sites, but if severe exposure is likely, you may wish to consider RC40 concrete. 

      Both are appropriate for stable floors, livestock areas and agricultural paving. 

      Light storage and livestock areas

      RC35 concrete / PAV2

      We recommend RC35 concrete, which is a heavy duty concrete for use with embedded reinforcement. It offers a durable, high quality finish, similar to RC30, but is much more substantial making it suitable for commercial and industrial use. 

      Common applications include piling and external slabbing and paving that will be subject to the constant loading and scraping imposed by industrial vehicles and machinery.

      What is PAV2?

      PAV2 mixes have an air entrainment additive, to create standard sized air bubbles in concrete. This helps to protect the surface from freeze-thaw cycles, making it especially useful for outdoor paving.

      Benefits of RC35 concrete for agricultural purposes: 

      • High durability and finish to withstand heavy machinery and traffic
      • Non-slip finish for safe handling of equipment and livestock
      • Supports compliance with Quality Assurance Schemes
      • Provides a barrier between ground moisture and stored materials / machinery 

      Other options for agricultural yards and external areas

      For external paving / routes between different units on farms, while you can use C35, C40 is also a viable option as mentioned for ‘severe’ exposure areas (those that won’t have protection from elements at all, or on sites where conditions are extreme all year round). 

      Similarly to RC35 concrete, RC40 has the same uses – stable floors, high traffic agricultural paving and roads – to provide a tough, durable barrier against regular scraping from machinery and between ground floor moisture and materials / livestock feed / equipment. 

      Benefits of RC40 concrete for agricultural purposes: 

      • Best for ‘severe’ exposure sites
      • High durability and finish to withstand heavy machinery and traffic
      • Non-slip finish for safe handling of equipment and livestock
      • Supports compliance with Quality Assurance Schemes
      • Provides a barrier between ground moisture and stored materials / machinery 

      Working out how much concrete is needed for agricultural and farming sites

      Estimating concrete quantities can be a tricky and often unnecessarily expensive task due to inadvertent over ordering. 

      Use our concrete calculator to work out how much you think you will need and we will arrive on-site and mix the exact requirements for the job.

      For sites that are difficult to access, such as facilities narrow access entrances, and for large concrete pours where the use of wheel barrows will be very time consuming, we would recommend using one of our concrete pumps, which will pump the concrete from the concrete lorry to the pour-site area saving you on time, labour and hard work! Call us for a quote on 01273 594394, or fill in our handy contact form

      What are building foundations and why are they so important?

      Building foundations – while not visible and below ground level – are one of the most crucial aspects of any build. They are used to ensure a building’s weight is distributed in an even fashion and to facilitate a solid footing for the building as a whole. Getting the footings and foundations right is paramount to avoid costly remedies later down the line, or, in worse case scenarios, even having to knock the building down and start again!

      We’re here to guide you on the type of concrete and foundation needed to ensure your project is completed without a hitch. You should also work closely with a structural engineer and building control to ensure any footings you have plans for are appropriate for the building type / improvements you are planning.

      Things to consider when laying foundations

      Trees and soil:

      Ordinarily carried out by digging a series of holes (trial holes) across your site, you can then use the analysis of soil type to judge general conditions for the location as a whole. It’s important to know the type of soil where you’re building, as certain soil makeups can cause subsidence and these need to be negated by building the correct footings and foundations.

      Even trees have a role to play in your decision making. In simple terms, depending on various factors, the closer a tree is to a new building the deeper the foundations must be taken down. To give an example – poplar trees have a high water demand and can potentially cause serious problems to foundations in shrinkable clays and soils, which may lead to cracking and sometimes movement. Also, should you have an existing tree in your garden, having it felled will not mean that the foundations will not be affected – heave in clay soil can take place when it takes up moisture and swells after the felling or removal of trees and hedgerows. In these instances, your structural engineer will advise what is necessary to overcome these issues and, in extreme cases, it may be necessary to use a different type of foundation, such as piled or raft foundation.

      Drainage and nearby structures:

      Drainage issues close to foundations can be very expensive to rectify. The proximity to your project can make excavation works more difficult, even impacting the structural integrity of your foundations.

      It may sound obvious, however the simplest way to negate problems with drainage pipes is to reroute the trenches that house the drainage a greater distance away from your foundations, if practical.

      The important aspect to remember – if drainage is close to your foundations – is to make sure no further loads from your foundations are put on the trenches for the drains. You can avoid this by simply increasing your foundation depth

      Types of foundations

      You get shallow or deep foundations, mainly. Commercial projects often require deep foundations, to allow a greater depth of soil to support taller and larger structures.

      Domestic projects on the other hand – for example for a new build home or extension – will only require shallower foundations, generally with less depth than the width of the property.

      Types of shallow foundations:

      Isolated footings / Pad foundation

      These are designed to support an individual column and are either square, circular or rectangular. Created to carry concentrated loads, with the thickness worked out by assessing the weight of the load and surrounding ground conditions.

      Combined footing

      When two or more columns are too close together, such that if you used isolated footings they’d overlap, then combined footings are the solution. Rectangular in shape, the extra length allows more than one column to sit atop.

      Strip foundation

      These are used to support continuous or sometimes stepped above ground structures, such as a wall, or multiple closely spaced columns. A good example of when these are used is for house foundations or footings for conservatories and extensions.

      Raft or mat foundation

      This type of foundation will need careful design by a structural engineer to ensure it’s suitable for your project. It’s designed as a solution if you can’t use strip foundations for any reason.

      Essentially, a raft solution gets its name because it’s a concrete slab that sits under the entire extension and ‘floats’ on the ground like a raft on water.

      Types of deep foundations (most often more commercial projects):

      Caisson – also known as pier / drilled shaft foundations

      These are cast on site, where a column of the required depth is drilled into the ground, then the hole has reinforced steel lowered into it, which is then filled with concrete.

      Pile foundations

      When the ground close to the surface isn’t appropriate for heavy loads, piles are put into the ground and filled with concrete. A ground beam then is used to enable the surface to be built upon.

      How to create your concrete footings and foundations

      Before you start any project, it’s vital that you seek expert advice on the type of foundations you will need, from a structural engineer. You will also need planning permission for any major project involving the need for new foundations, and your project will need to be signed off by Building Regulations.

      Once you’ve sought the appropriate advice, you are ready to do the following:

      Get your ground ready, cleared and dug to the right depth

      Mark out the area where your concrete is going to be poured, using string and pegs, allow an additional 50-75mm if you are planning to use formwork (which is what holds your concrete in place while it is curing).

      Once ready, dig your foundations to the specified depth. If you have sufficient space at your property, this is much easier if you use a digger to do so Depending on the ground conditions, the stability of the side walls of the trenches may not be great and there could be a risk of the side falling in, particularly if heavy rain is forecast, so it’s important to get your Building Inspector lined up and concrete booking scheduled in advance, to avoid any such issues.

      Once you’ve dug your foundations, You’ll also want to clear the ground of any stones / rocks / tree roots etc. and then level and compact the area. For floor slabs and isolated footings, you’ll want to leave enough depth for sub base (i.e. hardcore laid over the top of soil (approx. 100mm – subject to ground conditions), damp proof membrane (DPM), then the concrete itself.

      Add your sub base and make it compact the ground again

      Add your sub base and compact the ground, then add your Damp Proof Membrane (DPM) and set up your formwork for your concrete. Use our handy guide on laying concrete to guide you through this process.

      Order and pour your concrete!

      If you’ve followed the above steps, then you’re all set to order and pour your concrete. However, don’t forget to book your concrete well in advance to avoid any delays on site, you can always make a provisional booking and if necessary move your pour to another day if you have problems on site.

      Our ready mix concrete lorries will deliver the exact amount you need to site and our concrete pumps will pump the concrete from the lorry directly into your foundation excavation. Simply get in touch and we’ll help you work out what you need to successfully complete your project.

      It is essential that your building is positioned on a flat, solid and stable base, in order to bear the substantial weight and allow doors and windows to hang correctly and open smoothly.

      The base should always be the same size as the footprint of the building, making a base larger than your building is not recommended, this increases the risk of water ingress.

      Type of concrete needed

      C20/Gen 3 or C25 are the most suitable types of ready mixed concrete for sheds, log cabins and garden offices. Higher strength concrete and reinforcement may be required for larger structures and therefore mix strengths should always be checked with your builder or building supplier.

      How to measure a concrete base

      1. Location – Consider shade vs natural light. For a potting shed, you’ll want a shaded area, whereas a greenhouse obviously needs natural light and sunshine. Take time to consider proximity to mains for power supply, or the need to get a qualified electrician to install and RCD (Residual Current Device) from the main panel box. Leave a one-metre gap between your shed and any surrounding walls or fencing, being careful of overhanging branches.

      2. Measure your base – accurately measure and mark out the dimensions of your base. Check your dimensions are even by measuring diagonally; if they are the same, then the sides are equal.

      3. Level the site – either dig down to firm subsoil or put a layer of hardcore down and leave enough depth for the concrete to go on top.. About half of the depth of your base should be above ground level.

      4. Create a timber frame to contain the concrete. Use a spirit level to check the frame sits level on top of the hardcore and make any necessary adjustments. Place wooden pegs inside the frame and regular intervals to hold it in place. Sit pegs below the top level of the frame to make it easy to level off the concrete.

      How much concrete needed for a base

      Estimating concrete quantities can be a difficult, frustrating and often expensive task. You can use our concrete calculator to calculate how much you think you will need and we will arrive on-site and mix the exact requirements for the job.

      For bases that are difficult to access, such as at the bottom of your garden and for large concrete pours where the use of wheel barrows will be very time consuming, we would recommend using one of our concrete pumps, which will pump the concrete from the concrete lorry to the pour area saving you on time, labour and hard work! Call us for a quote.

      1. Preparing the garage base

      To prevent your garage floor concrete slab from cracking, it’s important to have a solid and level base. Additionally, if the ground level is to be built up, then proper compaction must be ensured to avoid uneven settlement.

      Make sure you remove all plant matter, rocks and debris and compact the area before adding the hardcore sub base and compacting again. You should have a solid compacted hardcore base on the soil, on which the reinforcement can be placed. The depths of hardcore will vary depending on ground conditions so we would recommend checking with your architect or builder.

      Then lay a Damp Proof Membrane (DPM) – ensuring the edges are turned up to form a tray and any joints are overlapped and taped.

      Create a timber frame to contain the concrete. Use a spirit level to check the frame sits level on top of the hardcore and make any necessary adjustments. Place wooden pegs inside the frame at regular intervals to hold it in place. Sit pegs below the top level of the frame to make it easy to level off the concrete.

      Overall the base should be 175mm bigger than the building on all sides.

      2. Measuring the thickness of the garage floor slab

      The thickness of the garage floor slab depends on factors such as:

      • Types of loads placed on the slab
      • Climatic condition
      • Mix of the concrete
      • Span of the concrete

      Standard thickness of the garage floor slabs used worldwide is 150mm. Depending upon the load placed on the slab, the thickness should be adjusted. Typical examples are:

      1. Light Loads – For one to two light cars, the concrete should be at least 100mm thick
      2. Medium Loads – If the garage is used for average-sized vehicles and/or medium to heavy trucks, the concrete needs to be 150mm thick
      3. Heavy Loads – If your garage floor is going to see constant traffic from heavy vehicles, it is recommended the concrete is 150mm to 200mm thick. The floor must also be treated and sealed properly to avoid heavy loads, like large trucks, cracking the concrete

      3. Reinforcement

      The reinforcement steel should be used just to hold the slab in position and avoid cracks. The slab will be supported by the ground underneath.

      4. Placing of Concrete

      Before placing the concrete make sure you have all the necessary tools and labour available to help. Having enough labour is often over looked and you can run the risk of the concrete going off before you have had chance to level it off and finish with a trowel.

      Typical basic tools required:

      • Shovel
      • Rake
      • Timber tamp (i.e. length of 4×2” timber)
      • Hand trowels
      • Spirit level or laser level

      When placing the concrete work in 1-2m strips across the width of the slab, levelling with a tamp and finishing with trowels as you go. A shovel and rake will be needed to help move the concrete around.  A vibrating poker can be used to help level and compact the concrete.

      The edges of the base should be chamfered to allow any water to drain off.

      For bases that are difficult to access, such as at the bottom of your garden and for large concrete pours where the use of wheel barrows will be very time consuming, we would recommend using one of our concrete pumps, which will pump the concrete directly from the concrete lorry to the pour area saving you on time, labour and hard work! Call us for a quote

      5. Curing of Garage Floor Slab

      Use slab curing methods, such as a water cure. Concrete is flooded; ponded, or a mist sprayer is used, to ensure proper curing of the garage floor slab and to help prevent shrinkage cracks

      It is important to allow sufficient curing time before applying any finishes to your garage floor as moisture on the slab may cause the finishes to lift or debond.

      6. Finishing for Garage Floor

      You can finish the garage floor using:

      • Garage Floor Epoxy
      • Garage Floor Paint
      • Garage Floor Mats
      • Garage Floor Tiles
      • Polished Concrete Flooring.

      How much concrete is needed for a base?

      Estimating concrete quantities can be a difficult, frustrating and often expensive task. You can use our concrete calculator to calculate how much you think you will need and we will arrive on-site and mix the exact requirements for the job.

      McHugh Concrete Truck on site in Portslade

      What you need to know

      Extra care must be taken when pouring concrete in cold weather. The biggest problem you will face is if concrete is allowed to cool below freezing point, the concrete may become so damaged that it will be unfit for purpose. 

      It is also important to understand that even if temperatures do not drop below 0°C, the concrete will develop strength at a much slower rate than during warmer weather.

      The main problem when pouring at sub zero is if freshly poured concrete cools below 0°C the water in the mix will freeze and expand resulting in damaged and unusable concrete.

      The key to a successful pour is for the concrete first to be able to reach a strength of about 2 N/mm2, if this happens it is much more likely to resist any problematic expansion. In most occasions and for most mixes, this strength is achieved within 48 hours if the concrete is kept at or above 5°C. However, even after the concrete has reached 2 N/mm2 low temperatures will slow down the strength development.

      During cold weather the most important thing is to keep the concrete warm (above 5°C) for the first 48 hours, then it is important to ensure that the strength is still allowed to develop, at the lower rate associated with cold weather.

      Checklist for pouring on cold weather

      • Plan ahead: Check the temperature the day before and on the day of your pour
      • If temperatures are likely to be below 5°C then make a plan to avoid complications
      • Never allow concrete to be laid onto frozen ground, ice or snow!
      • Use thermal blankets to help prevent frost from forming overnight and help to retain the heat of the concrete
      • Protect freshly laid concrete with thermal blankets and windbreaks (if necessary)
      • Don’t let your concrete freeze within 48 hours of being poured

      If you need any further advice regarding the placement of concrete during cold weather conditions please do not hesitate to contact our office on 01273 594394

      Help and Advice

      © 2025 McHugh Concrete Ltd. Company number: 10921912. Registered address: 225 London Road, Burgess Hill, West Sussex, RH15 9QU